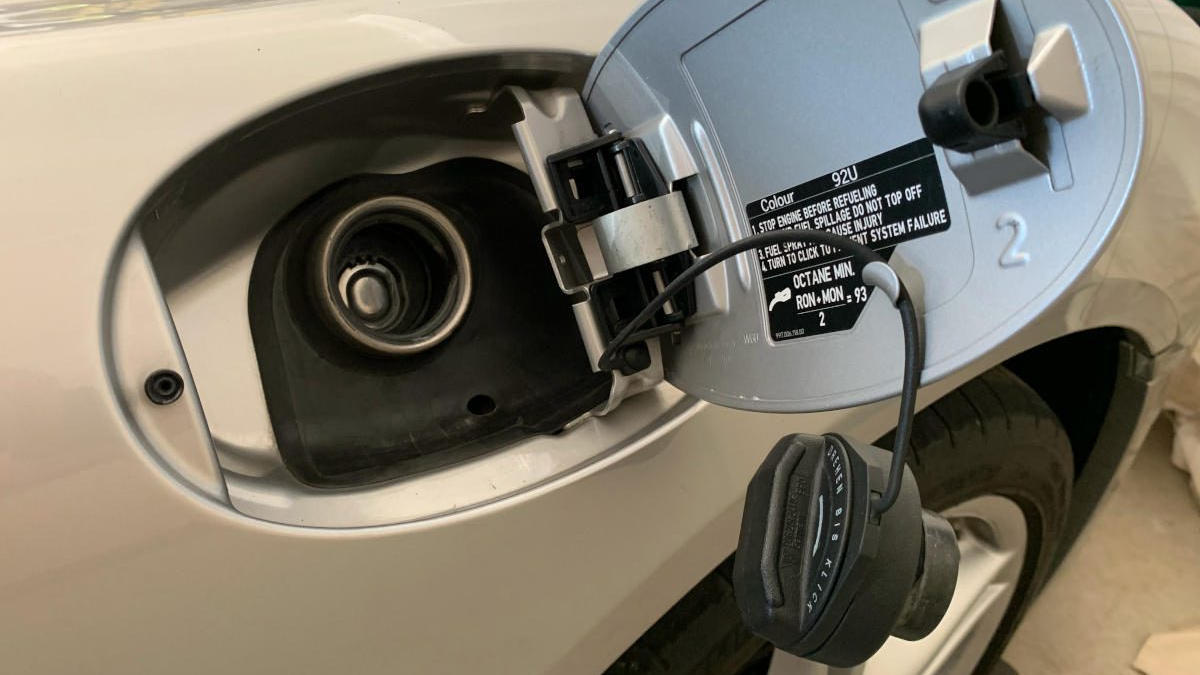
The replacement of the Porsche Cayman gas cap is very simple.
No products found.
Reasons Requiring the Porsche Cayman Gas Cap Replacement
With age and use, the Porsche Cayman Gas Cap will experience wear or cracking. This results in an uneven seal to the gas tank and EVAP canister.
CEL (Check Engine Light)
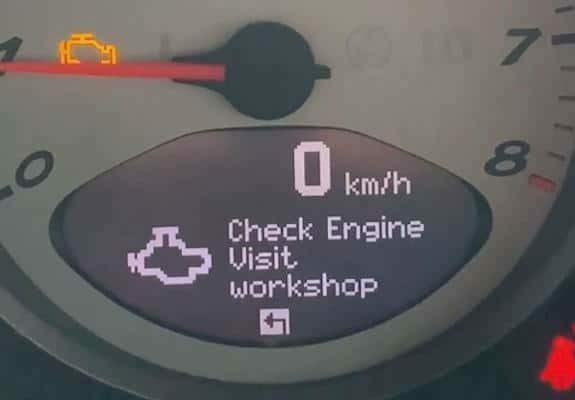
If you are driving your Porsche Cayman and experience a CEL light, you need to read the CEL code quickly.
WARNING: If CEL light is flashing you need to pull over and have your Cayman towed.
Never drive your car with a flashing CEL!
You need to make use a good OBD2 Code Reader and get the CEL code.
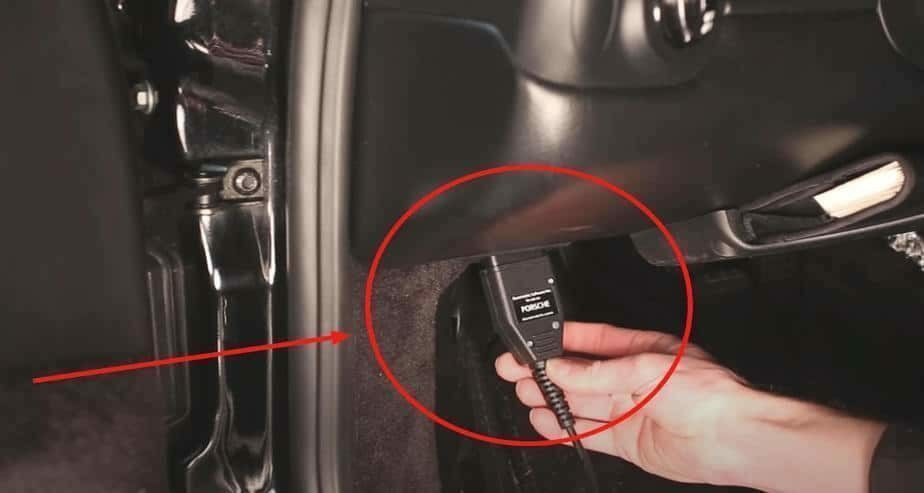
Reading the CEL Code
To read the CEL code on your Porsche Cayman, you simply turn the car off, install the OBD II reader plug into the receptacle (under the dash, show below.) Once installed, move the key to the ACC position and do not start the car.
Follow the instruction on your OBD reader and obtain the CEL code.
If your CEL error is related to your EVAP system, you should reset the CEL code, check the gas cap for proper closure and drive your Cayman to determine if the CEL error is a persistent problem (reoccurs).
Common Cayman CEL Code(s) for Gas Cap Replacement
P0440 CEL Error Code
- Missing fuel cap
- Defective or damaged fuel cap
- Distorted or damaged Fuel Tank Filler Neck
- Torn or punctured evaporative system hose(s)
- Defective Fuel Tank Sending Unit gasket or seal
- Split or damaged Carbon Canister
- Defective Evaporative Vent Valve and/or Evaporative Purge Valve
- Defective or damaged fuel tank
P0441 CEL Error Code
- Missing fuel cap
- Stuck open or closed purge valve
- Defective or damaged fuel cap
- Distorted, damaged, or cracked Fuel Tank Filler Neck
- Torn or punctured Evaporative system hose(s)
- Defective Fuel Tank Sending Unit gasket or seal
- Split or damaged Carbon Canister
- Defective Evaporative Vent Valve
- Defective or damaged fuel tank
P0442 CEL Error Code
- Defective or damaged fuel cap
- Distorted or damaged Fuel Tank Filler Neck
- Small tear or puncture in the Evaporative system hose(s) and/or Carbon Canister
- Defective Fuel Tank Sending Unit gasket or seal
- Small split in a seam of the Carbon Canister
- Defective Evaporative Vent Valve and/or Evaporative Purge Valve
- Damaged or Defective Fuel Tank
- Defective Fuel Tank Pressure Sensor
- Defective Leak Detection Pump
- Slightly loose and/or worn clamps or hardened O-rings anywhere in the EVAP system
P0455 CEL Error Code
- Missing fuel cap
- Defective or damaged fuel cap
- Distorted or damaged Fuel Tank Filler Neck
- Torn or punctured Evaporative system hose(s)
- Defective Fuel Tank Sending Unit gasket or seal
- Split or damaged Carbon Canister
- Defective Evaporative Vent Valve and/or Evaporative Purge Valve
- Damaged or Defective fuel tank
- Defective Fuel Tank Pressure Sensor
P0456 CEL Error Code
- Missing fuel cap
- Defective or damaged fuel cap
- Distorted or damaged Fuel Tank Filler Neck
- Torn or punctured Evaporative system hose(s)
- Defective Fuel Tank Sending Unit gasket or seal
- Split or damaged Carbon Canister
- Defective Evaporative Vent Valve and/or Evaporative Purge Valve
- Damaged or Defective fuel tank
- Defective Fuel Tank Pressure Sensor
Howto: Porsche Cayman Gas Cap Replacement
The hardest part of replacing your Porsche Cayman gas cap is the removal of the plastic rivet.
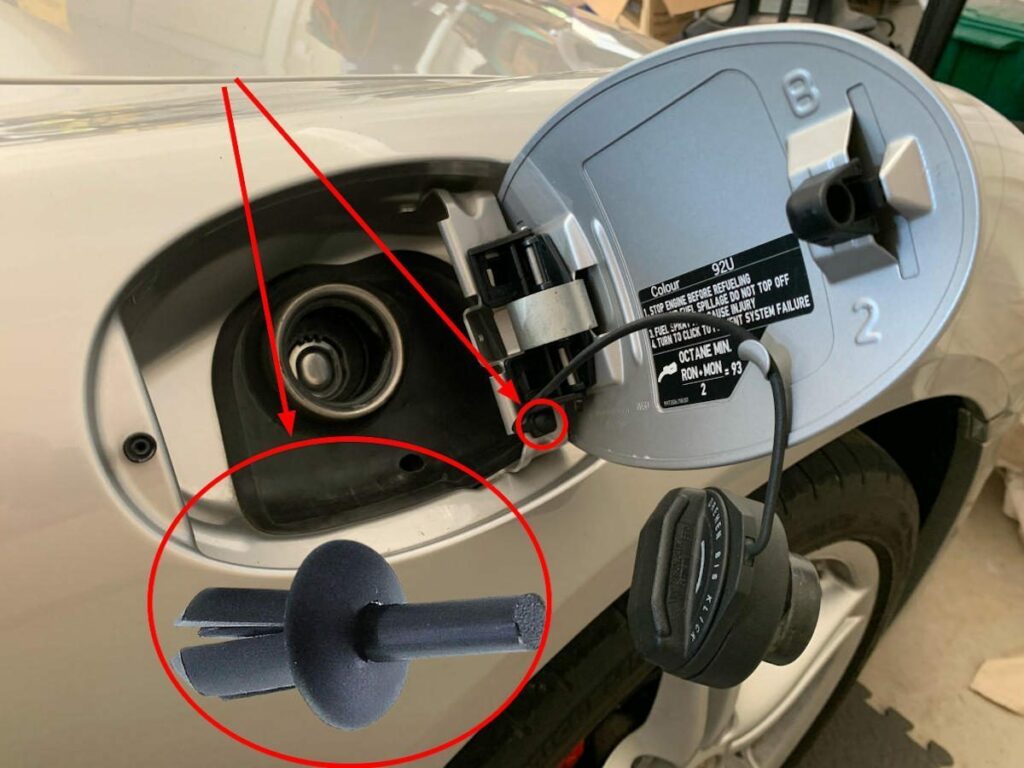
- Locate the Porsche Plastic rivet that holds the gas cap plastic strap in place.
- Use a punch tool or small finishing nail to lightly push the plastic center dowel of the plastic rivet through the rivet enclosure. Be careful to catch the center plastic dowel as it pushes free.
- Lightly pry the plastic rivet housing out of position with your fingernail.
- Ensure that no damage comes to the rivet.
- Install. the new Porsche gas cap into place using the plastic rivet housing and push the small plastic center down into place.
- This will fully secure the new Porsche gas cap.
- Install the Porsche gas cap into the gas tank opening and turn it firmly 3-5 clicks to ensure a proper seal.
Tips For Your Cayman
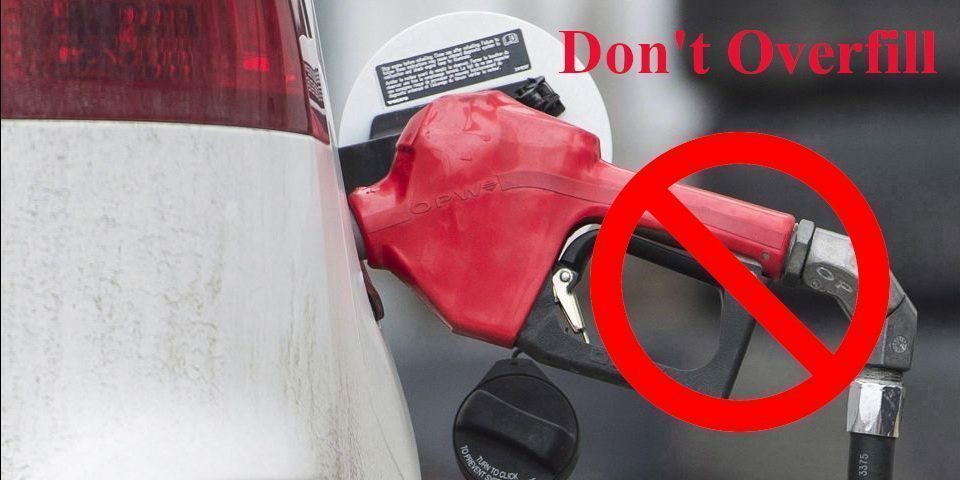
- Always ensure a proper seal of your gas cap when re-fueling your Cayman. Always turn the cap closed 3-5 clicks.
- Never over-fuel your gas tank. Always stop fueling at the first sign of the gas nozzle shut off (unless it is clear that your gas tank is only partially full. Over fueling of your gas tank can lead to P2402 CEL “Leak Detection Pump Error”. Never over fuel.
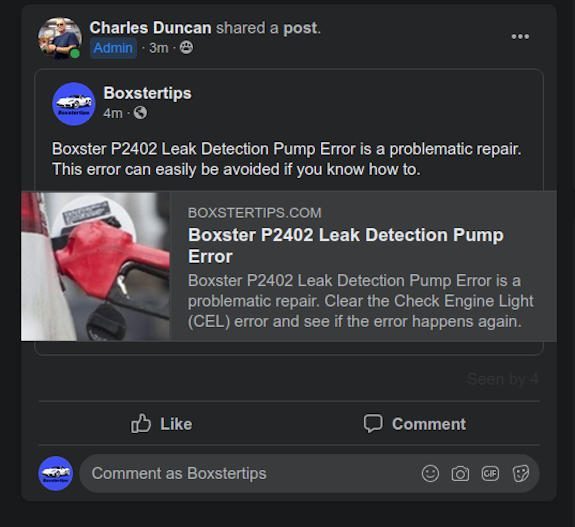
Avoiding a P2402 CEL Error on Your Cayman
Last update on 2026-07-21 / Affiliate links / Images from Amazon Product Advertising API